Exercises (3162)
Lateral raising and lowering of the arms while standing ► lateral raise
Power
Individual work

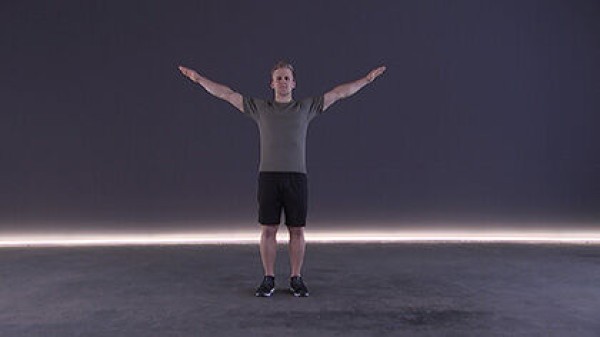
Stand upright with your feet shoulder-width apart, arms outstretched to the side (shoulder height), raise and lower your arms or perform circular movements with your arms (vary the range).
Attention:
Do not circle your arms below hip height or above head height (tension).
Lighten:
Just hold the position.
Harden:
Hold additional weight on your arms or in your hands.
2 weight cuffs/weight balls/dumbbells ► Make the exercise more difficult (additional weight)
Lateral raising and lowering of the arms while standing ► lateral raise
Power
Individual work

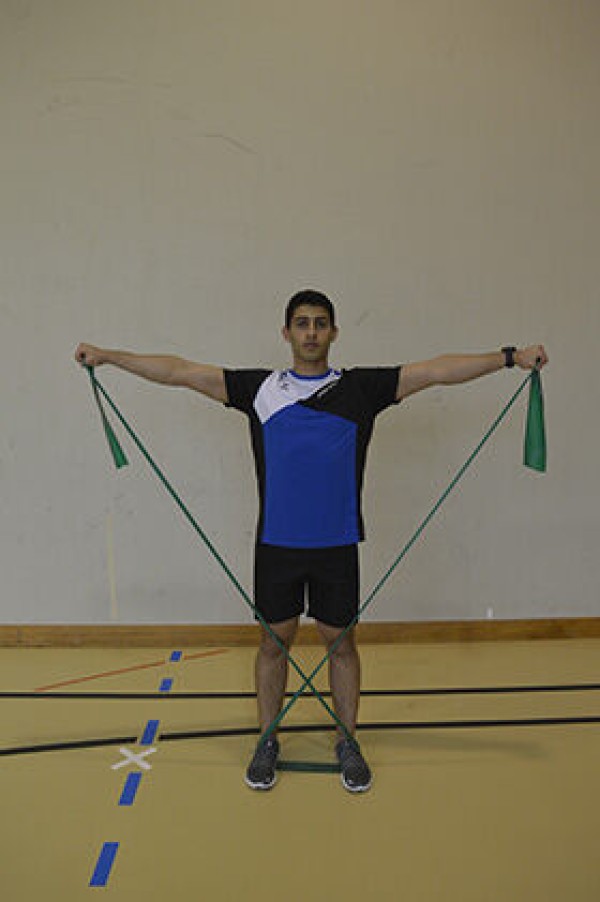
Stand shoulder-width apart in the centre of the elastic band, with your upper body tilted far forward and your arms hanging down at the side of your body (shoulders set) Cross the elastic band and grasp one end with each hand, raise your arms sideways to approximately shoulder height and lower them back to the starting position.
Attention:
The upper body remains stable.
Lighten:
Choose an elastic band with less resistance.
Harden:
Choose an elastic band with greater resistance.
1 elasticated rubber band
Lateral raising and lowering of the arms while standing ► lateral raise
Power
Individual work


Stand upright, shoulder-width apart in the centre of the elastic band with your arms hanging down at the side of your body (shoulders set). Grasp one end of the elastic band with each hand, stretch your arms sideways up to approximately shoulder height and lower them back to the starting position.
Attention:
Keep your shoulders stable (do not bring them towards your neck), do not hunch your back (tighten your stomach).
Lighten:
Choose an elastic band with less resistance.
Harden:
Choose an elastic band with more resistance.
Variant:
Stepping position, step onto the centre of the elastic band with your front foot, cross the ends of the band and grasp them next to your body (palms facing upwards), arms bent and elbows resting against your body, raise your arms sideways to approximately shoulder height and lower them back to the starting position, keeping your shoulders stable.
1 elasticated rubber band
Raising and lowering the arms sideways while standing ► lateral raise / side raise
Power
Individual work


Stand upright shoulder-width apart, arms pointing downwards with the dumbbells (or kettlebells) in your hands (hanging), the backs of your hands pointing outwards (neutral grip), raise your arms (almost) straight sideways to shoulder height (backs of hands pointing upwards) and lower them back to the starting position (side raise).
Attention:
Have a straight back (possibly back against a wall), actively tense your torso. Back against a wall), actively tense your torso, do not let your arms sag completely (maintain tension).
Lighten:
Less weight.
Harden:
More weight.
Variant:
Arms bent (approximately right angle at the elbow joint), with the backs of the hands pointing outwards/to the side, raise bent arms to shoulder height (backs of hands pointing upwards).
2 dumbbells/kettlebells
Raising and lowering the arms sideways while standing ► lateral raise / side raise
Power
Individual work


Stand with your feet shoulder-width apart (if necessary, also in a lunge with your legs slightly offset forwards and backwards) and hold the dumbbells in a neutral grip at thigh height (if necessary, replace dumbbells with kettlebells). The upper body is in a slight forward position. The arms are now simultaneously spread out to the side while the torso is held in the same position. The dumbbells/kettlebells are raised to shoulder height (max. eye level) before the weight is lowered to the starting position in a controlled manner.
Starting position:
- Stand shoulder-width apart, dumbbells in neutral grip at thigh level (hold kettlebells in overhand grip)
- Elbows are slightly bent (do not straighten arms)
Finishing position:
- Dumbbells/kettlebells raised sideways up to eye level (T-position)
- Abdominal muscles are tensed
- Keep your head straight in a neutral position and look forwards
Variant:
The exercise can also be performed alternately, making sure that the body is kept straight and does not tilt to one side.
2 dumbbells/kettlebells
Raising and lowering the arms sideways while standing ► rear delt raise
Power
Individual work


The upper body is bent forwards with a straight back. Hold the dumbbells in a neutral grip in front of your thighs (replace dumbbells with kettlebells if necessary). Now slowly pull the slightly bent arms upwards sideways at the same time until the weights are at shoulder height (pull the shoulder blades together). Slowly return to the starting position.
Starting position:
- Stand with your feet hip-width apart, knees slightly bent and upper body leaning forwards with a straight back. Look down at an angle and hold the weights in a neutral grip at knee height
- Elbows are slightly bent (do not straighten your arms)
Final position:
- Lift the dumbbells/kettlebells sideways up to shoulder height
- Keep your core tensed at all times
Attention:
It is essential to keep your back straight during this exercise, otherwise not only the effectiveness of the exercise will suffer, but also your back and spine. The rule is: less is more!
Variant I:
The exercise can also be performed sitting on a flat bench. The upper body remains strongly inclined forwards. The dumbbells/kettlebells are brought together between the seated person and the legs and raised to shoulder height.
Variant II:
The exercise can also be performed lying on your stomach on a flat or incline bench.
2 dumbbells/kettlebells
1 flat bench ► Variation of the exercise
Raising and lowering the arms sideways in prone position ► arm raise
Power
Individual work


Lie on your stomach with your arms stretched out to the side at shoulder height (palms facing down). Raise and lower your arms.
Attention:
Keep your forehead in contact with the floor, do not lower your arms completely.
Lighten:
Barely raise/lower your arms; just hold the position (arms held sideways).
Harden:
Hold additional weight on your arms or in your hands.
2 weight cuffs/weight balls/dumbbells ► Make the exercise more difficult (additional weight)
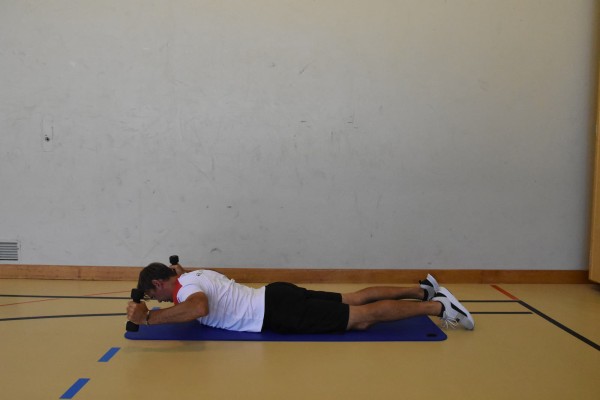
Lateral raising and lowering of the arms in prone position ► prone T
Power

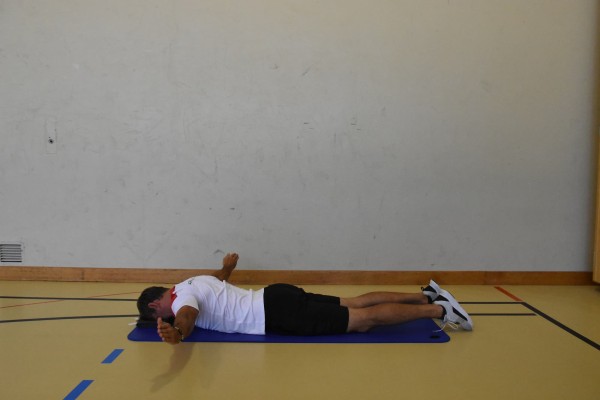
Lie on your stomach with your forehead resting on a folded cloth, feet shoulder-width apart, arms pointing to either side (T-position), arms stretched and completely relaxed. From this position, pull the shoulder blades together and raise the arms until the elbows are at shoulder height and the arms are parallel to the floor (palms facing forward or downward). Keep your arms straight throughout the entire movement. Exhale in the end position, hold the position for a moment, then inhale and lower your arms back to the starting position.
Attention:
Only the arms should be raised, nothing else - aim to isolate the upper back.
Harden:
Do not lower your arms completely; hold additional weight in your hands or on your arms.
Variation I:
Alternately raise one arm (instead of both at the same time).
Variation II:
Position on a flat bench or an incline bench.
2 weight cuffs/2 weight balls/dumbbells ► Make the exercise more difficult (additional weight)
Lateral raising and lowering of the arms in prone position ► prone T raise / prone lateral raise
Power
Prone position with upper body slightly raised, feet shoulder-width apart, arms pointing to either side (T-position), arms stretched and completely relaxed. From this position, pull the shoulder blades together and raise the arms until the elbows are at shoulder height and the arms are parallel to the floor (palms facing forward or downward). Keep your arms straight throughout the entire movement. Exhale in the end position, hold the position for a moment, then inhale and lower your arms back to the starting position.
Attention:
Only the arms should be raised, nothing else - aim to isolate the upper back.
Harden:
Do not lower your arms completely; hold additional weight in your hands or on your arms.
Variation I:
Alternately raise one arm (instead of both at the same time).
Variation II:
Position on a flat bench or an incline bench.
2 weight cuffs/2 weight balls/dumbbells ► Make the exercise more difficult (additional weight)
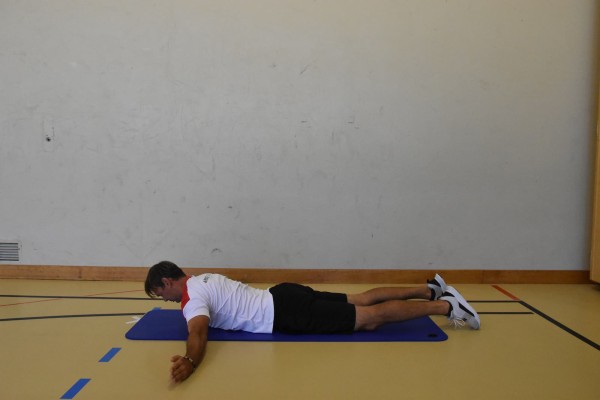
Lateral raising and lowering of the arms in prone position ► prone W
Power
Lie on your stomach with your forehead resting on a folded cloth, feet shoulder-width apart, arms bent, elbows close to your body, arms pointing diagonally forwards to the respective side (W position), arms completely relaxed. From this position, pull your shoulder blades together and raise your arms until your elbows are at shoulder height and your arms are parallel to the floor (palms facing inwards at an angle). Exhale in the end position, hold the position for a moment, then inhale and lower your arms back to the starting position.
Attention:
Only the arms should be raised, nothing else - aim to isolate the upper back.
Harden:
Do not lower your arms completely; hold additional weight in your hands or on your arms.
Variation I:
Alternately raise one arm (instead of both at the same time).
Variation II:
Position on a flat bench or an incline bench.
2 weight cuffs/2 weight balls/dumbbells ► Make the exercise more difficult (additional weight)
Lateral raising and lowering of the arms in prone position ► prone raise
Power
Prone position with upper body slightly raised, feet shoulder-width apart, arms bent, elbows close to your body, arms pointing diagonally forwards to the respective side (W position), arms completely relaxed. From this position, pull your shoulder blades together and raise your arms until your elbows are at shoulder height and your arms are parallel to the floor (palms facing inwards at an angle). Exhale in the end position, hold the position for a moment, then inhale and lower your arms back to the starting position.
Attention:
Only the arms should be raised, nothing else - aim to isolate the upper back.
Harden:
Do not lower your arms completely; hold additional weight in your hands or on your arms.
Variation I:
Alternately raise one arm (instead of both at the same time).
Variation II:
Position on a flat bench or an incline bench.
2 weight cuffs/2 weight balls/dumbbells ► Make the exercise more difficult (additional weight)
Lateral raising and lowering of the arms in prone position ► prone weighted T
Power
Lie on your stomach with your forehead resting on a folded cloth, feet shoulder-width apart, arms pointing to either side (T-position), arms stretched and completely relaxed. Hold a (light) dumbbell in each hand. From this position, pull the shoulder blades together and raise the arms until the elbows are at shoulder height and the arms are parallel to the floor (palms facing down). Keep your arms straight throughout the entire movement. Exhale in the end position, hold the position for a moment, then inhale and lower your arms back to the starting position.
Attention:
Only the arms should be raised, nothing else - aim to isolate the upper back.
Harden:
Do not lower your arms completely.
Variation I:
Alternately raise one arm (instead of both at the same time).
Variation II:
Position on a flat bench or an incline bench.
2 weight cuffs/2 weight balls/dumbbells
Lateral raising and lowering of the arms in prone position ► prone weighted T raise / prone weighted lateral raise
Power
Prone position with upper body slightly raised, feet shoulder-width apart, arms pointing to either side (T-position), arms stretched and completely relaxed. Hold a (light) dumbbell in each hand. From this position, pull the shoulder blades together and raise the arms until the elbows are at shoulder height and the arms are parallel to the floor (palms facing down). Keep your arms straight throughout the entire movement. Exhale in the end position, hold the position for a moment, then inhale and lower your arms back to the starting position.
Attention:
Only the arms should be raised, nothing else - aim to isolate the upper back.
Harden:
Do not lower your arms completely.
Variation I:
Alternately raise one arm (instead of both at the same time).
Variation II:
Position on a flat bench or an incline bench.
2 weight cuffs/2 weight balls/dumbbells
Lateral raising and lowering of the arms in prone position ► prone weighted W
Power
Lie on your stomach with your forehead resting on a folded cloth, feet shoulder-width apart, arms bent, elbows close to your body, arms pointing diagonally forwards to the respective side (W position), arms completely relaxed. Hold a (light) dumbbell in each hand. From this position, pull your shoulder blades together and raise your arms until your elbows are at shoulder height and your arms are parallel to the floor (palms facing inwards at an angle). Exhale in the end position, hold the position for a moment, then inhale and lower your arms back to the starting position.
Attention:
Only the arms should be raised, nothing else - aim to isolate the upper back.
Harden:
Do not lower your arms completely.
Variation I:
Alternately raise one arm (instead of both at the same time).
Variation II:
Position on a flat bench or an incline bench.
2 weight cuffs/2 weight balls/dumbbells
Lateral raising and lowering of the arms in prone position ► prone weighted W raise
Power
Prone position with upper body slightly raised, feet shoulder-width apart, arms bent, elbows close to your body, arms pointing diagonally forwards to the respective side (W position), arms completely relaxed. Hold a (light) dumbbell in each hand. From this position, pull your shoulder blades together and raise your arms until your elbows are at shoulder height and your arms are parallel to the floor (palms facing inwards at an angle). Exhale in the end position, hold the position for a moment, then inhale and lower your arms back to the starting position.
Attention:
Only the arms should be raised, nothing else - aim to isolate the upper back.
Harden:
Do not lower your arms completely.
Variation I:
Alternately raise one arm (instead of both at the same time).
Variation II:
Position on a flat bench or an incline bench.
2 weight cuffs/2 weight balls/dumbbells
Lateral raising and lowering of the arm while standing (left) ► lateral raise
Power
Individual work
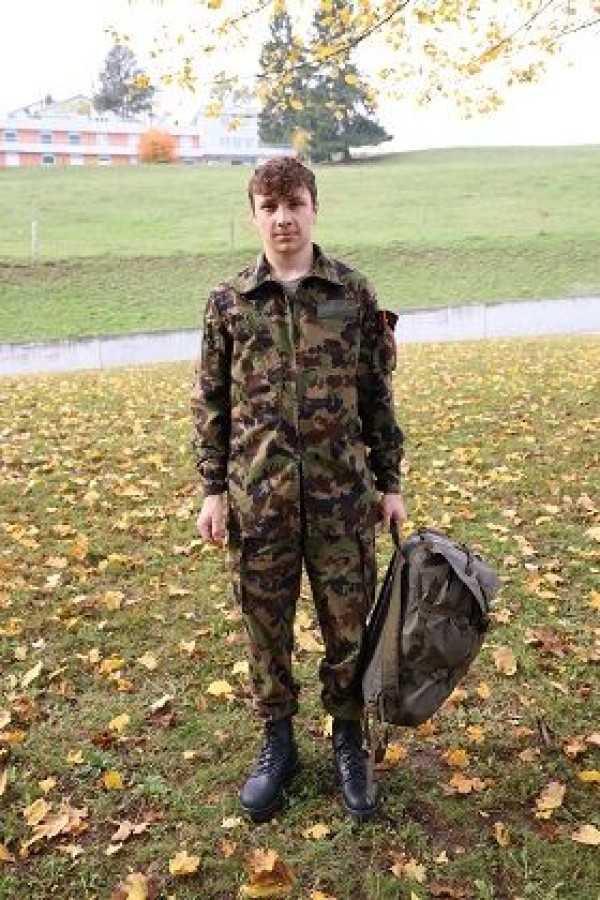
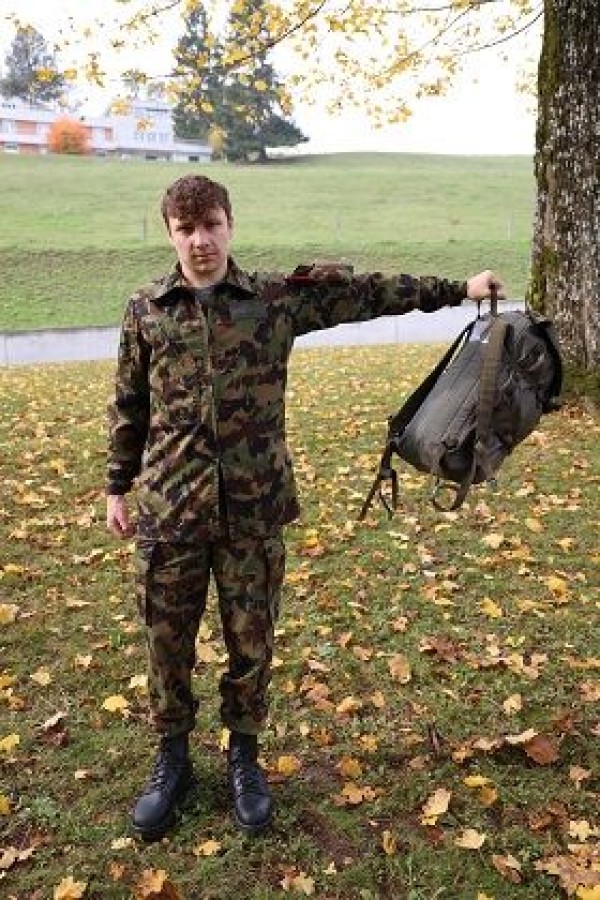
Stand upright, hold an object to the side of your body with your left hand (e.g. rucksack or sandbag) and then raise your arm sideways to shoulder height and lower it back to the starting position (side raise).
Attention:
Do not work with momentum, knees slightly bent, tense torso.
Lighten:
Less weight/load.
Harden:
More weight/greater load.
1 combat rucksack/sandbag (light)
1 PET bottle (1.5 litres)/helmet ► Make the exercise easier
1 sandbag (medium) ► Make the exercise more difficult (additional weight)
Lateral raising and lowering of the arm while standing (right) ► lateral raise
Power
Individual work
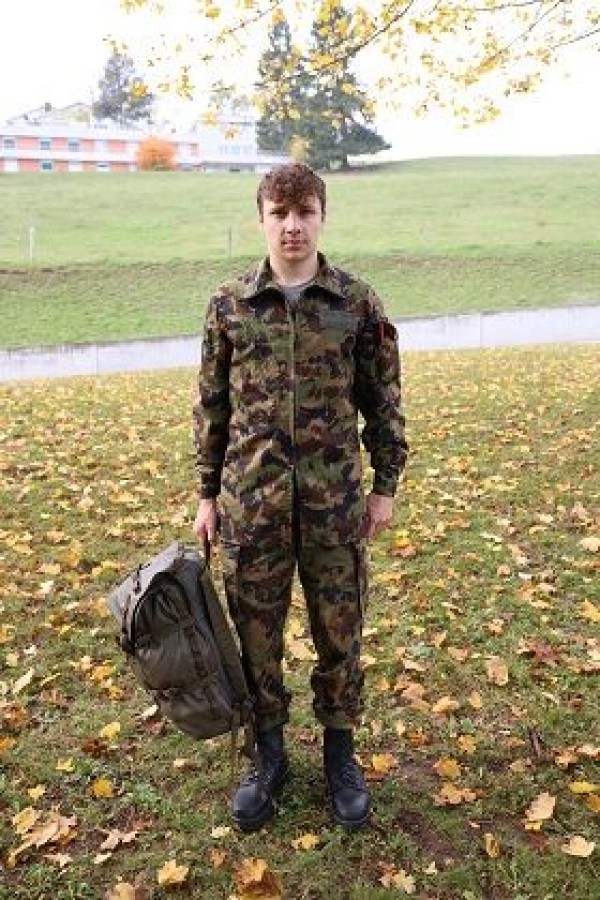
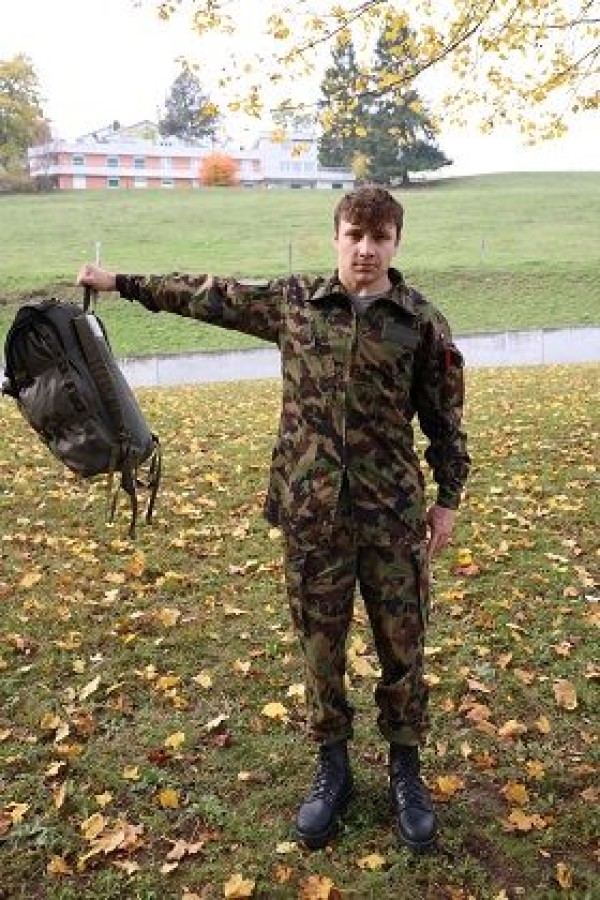
Stand upright, hold an object to the side of your body with your right hand (e.g. rucksack or sandbag) and then raise your arm sideways to shoulder height and lower it back to the starting position (side raise).
Attention:
Do not work with momentum, knees slightly bent, tense torso.
Lighten:
Less weight/load.
Harden:
More weight/greater load.
1 combat rucksack/sandbag (light)
1 PET bottle (1.5 litres)/helmet ► Make the exercise easier
1 sandbag (medium) ► Make the exercise more difficult (additional weight)
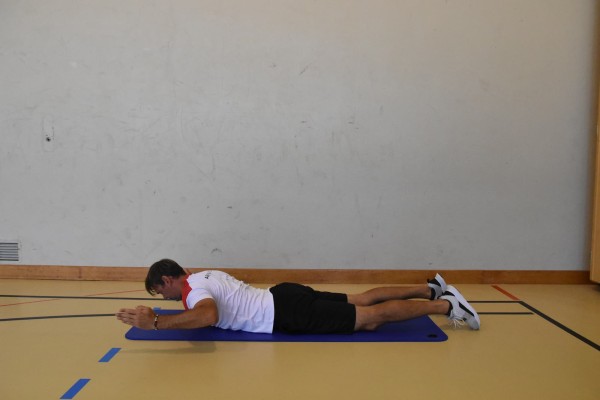
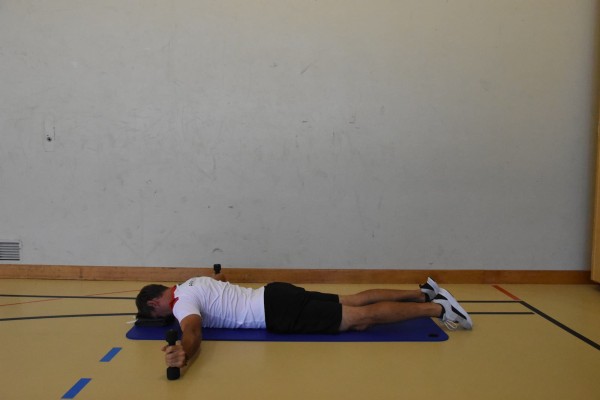
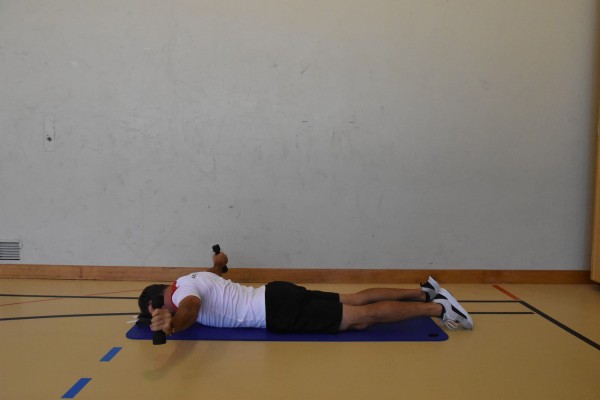
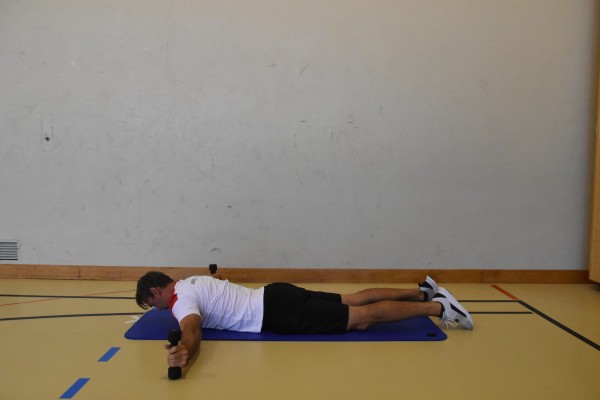
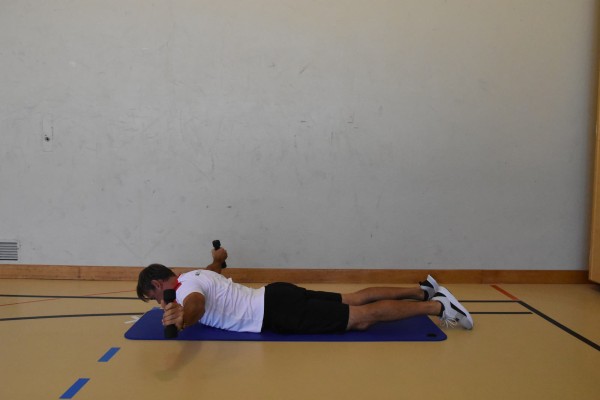
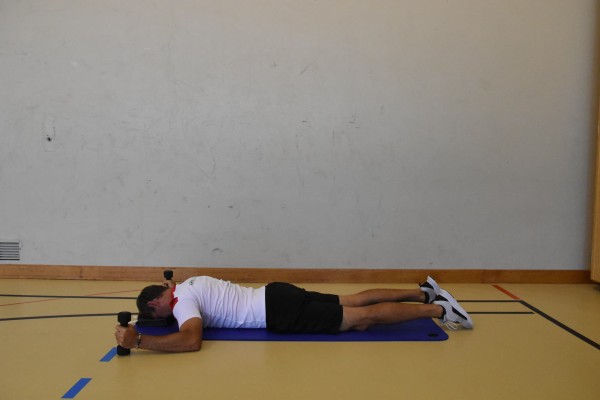
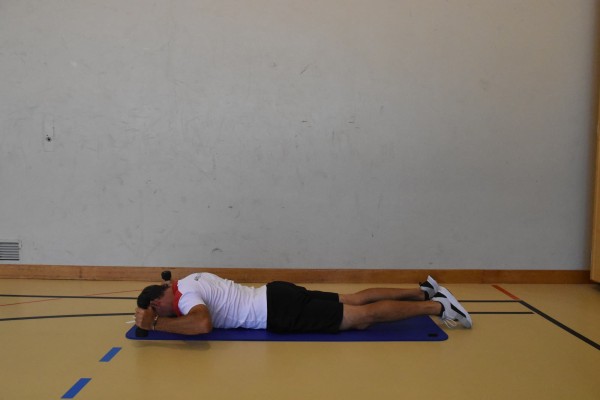
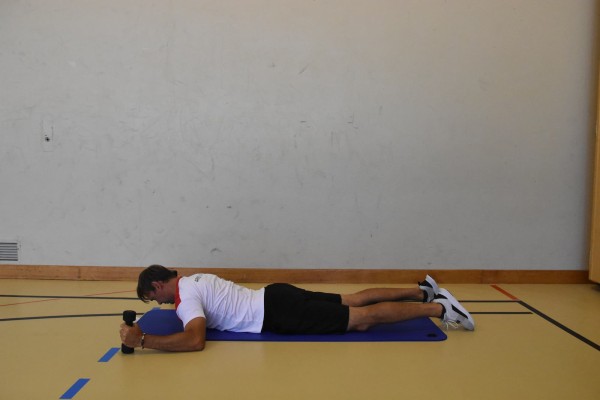
Lateral raising and lowering of the upper body in prone position ► lying back extension
Power
Individual work


Prone position, arms bent in front of you, hold the pistol in both hands (lying position), move the pistol from one side to the other and simultaneously raise the upper body sideways.
Attention:
Do not lower the upper body completely.
Lighten:
Just hold the position.
1 pistol (neutralised)
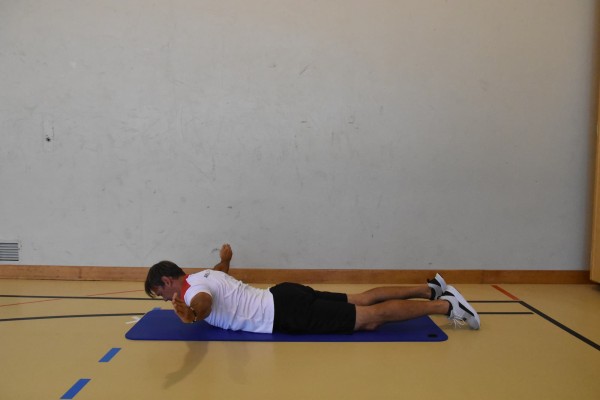
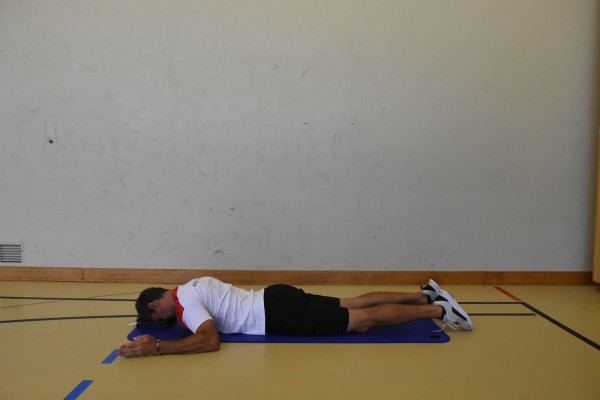
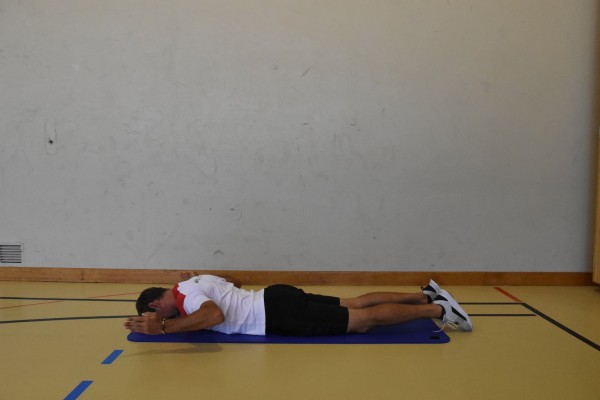
Lateral raising and lowering of the upper body in prone position ► lying back extension / back bowes
Power
Individual work


Lying on your stomach with your arms bent in front of your head (or your hands closer together as you would hold a bowl, but palms facing upwards). Move your elbows approximately at shoulder height and your arms from side to side while lifting your upper body sideways (arms move in a semicircle, head/gaze follows the movement).
Attention:
Do not lower your upper body completely.
Lighten:
Lift the upper body less/rotate less to the side; only hold the centre position with the upper body raised.
Harden:
Hold additional weight on the arms or in the hands.
2 weight cuffs/weight balls/1 (medicine) ball/weight disc/1-2 dumbbells ► Make the exercise more difficult (additional weight)
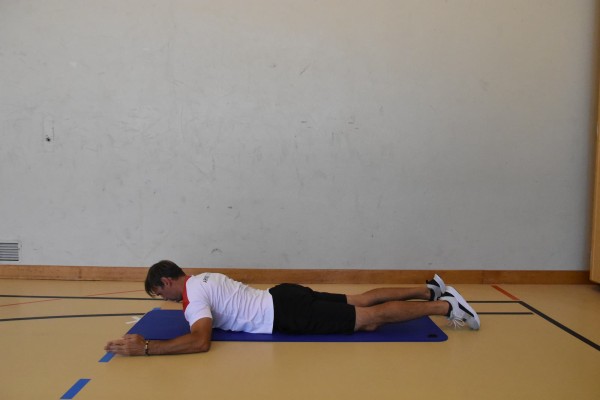
Lateral raising and lowering of the upper body in prone position ► lying back extension / back bowes
Power
Individual work
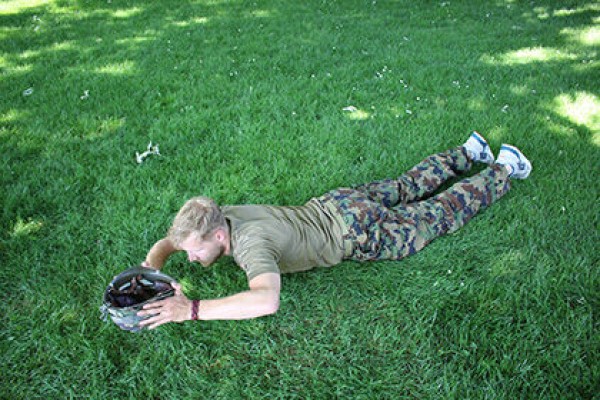

Lying on your stomach with your arms and legs stretched out and slightly raised from the floor (legs can also be put down). Hold an object (e.g. helmet) in your hands and move the object from one side to the other while lifting your upper body sideways (arms move in a semicircle, head/gaze follows the movement).
Attention:
Do not lower your upper body completely.
Lighten:
Do not hold an object in your hands; lift your upper body less/rotate less to the side; only hold the centre position with your upper body raised.
Harden:
Additional weight (e.g. place stones in your helmet/hold a backpack).
1 helmet
1 combat rucksack/3-4 stones ► Make the exercise more difficult (additional weight)
Lateral bending of the legs in the seat (left) ► knee to twist
Power
Individual work


When seated, use your arms to support your upper body, which is leaning slightly backwards, bend your outstretched, raised legs to the side (left) of your body (knees pointing diagonally upwards, feet by your buttocks) and return to the starting position (bend and stretch your legs and tilt them to the side).
Attention:
Do not put your legs down completely.
Lighten:
Do not fully extend your legs or always keep them bent (the smaller the angle, the easier).
Harden:
Additional weight on or between the legs.
2 weight cuffs/1 weight disc/(medicine) ball ► Make the exercise more difficult (additional weight)
Bending the legs sideways in the seat (right) ► knee to twist
Power
Individual work


When seated, use your arms to support your upper body, which is leaning slightly backwards, bend your outstretched, raised legs to the side (right) of your body (knees pointing diagonally upwards, feet by your buttocks) and return to the starting position (bend and stretch your legs and tilt them to the side).
Attention:
Do not put your legs down completely.
Lighten:
Do not fully extend your legs or keep them bent at all times (the smaller the angle, the easier).
Harden:
Additional weight on or between your legs.
2 weight cuffs/1 weight disc/(medicine) ball ► Make the exercise more difficult (additional weight)
Alternating lateral bending of the legs in the seat ► knee to twist
Power
Individual work


When seated, use your arms to support your upper body, which is tilted slightly backwards, bend your outstretched, raised legs to the side of your body (knees pointing diagonally upwards, feet by your buttocks) and return to the starting position (bend and stretch your legs and tilt them to the side). Switch sides after each exercise.
Attention:
Do not fully lower your legs.
Lighten:
Do not fully extend your legs or always keep them bent (the smaller the angle, the easier).
Harden:
Additional weight on or between the legs.
2 weight cuffs/1 weight disc/(medicine) ball ► Make the exercise more difficult (additional weight)
Bending the legs sideways in supine position (left) ► knee to twist
Power
Individual work


Back position, upper body flat on the floor, arms stretched out to the side on the floor (or place hands under the buttocks), bend outstretched, raised legs to the side (left) of the body (knees pointing diagonally upwards, feet by the buttocks) and return to the starting position (bend and stretch legs and tilt to the side).
Attention:
Do not put your legs down completely, keep your (lower) back in constant contact with the floor (consciously tense your stomach).
Lighten:
Do not fully extend your legs or always keep them bent (the smaller the angle, the easier).
Harden:
Additional weight on or between your legs.
2 weight cuffs/1 weight disc/(medicine) ball ► Make the exercise more difficult (additional weight)
Bending the legs sideways in supine position (right) ► knee to twist
Power
Individual work
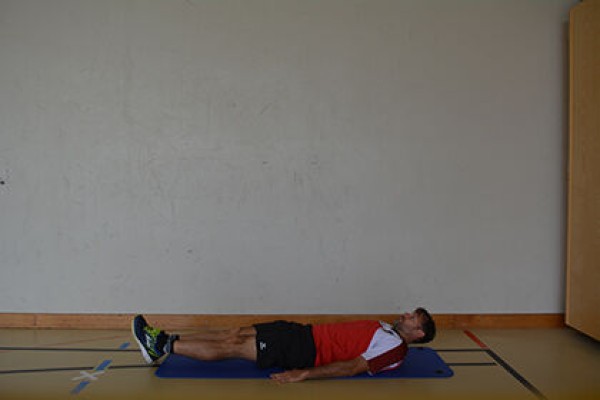

Back position, upper body flat on the floor, arms stretched out to the side on the floor (or place hands under the buttocks), bend outstretched, raised legs to the side (right) of the body (knees pointing diagonally upwards, feet by the buttocks) and return to the starting position (bend and stretch legs and tilt to the side).
Attention:
Do not put your legs down completely, keep your (lower) back in constant contact with the floor (consciously tense your stomach).
Lighten:
Do not fully extend your legs or always keep them bent (the smaller the angle, the easier).
Harden:
Additional weight on or between your legs.
2 weight cuffs/1 weight disc/(medicine) ball ► Make the exercise more difficult (additional weight)